

How To Replace Nexus 5x Screen
How to Replace the Nexus 5 Cracked Screen
BY alina | December eighth, 2013 | | 7
It'southward well known that the Nexus five front end drinking glass, digitizer and LCD are fused together to the display frame. This means although yous only crack one of the iii parts, you have to supervene upon the entire Nexus 5 screen. Follow our Nexus five disassembly and assembly videos, you can learn how to replace the Nexus 5 cracked screen yourself. You tin can also learn how to supplant other broken parts on your Nexus 5 according to these two videos. ETrade Supply is always your prime choice to get the Nexus 5 replacement parts. Please notation the DIY repair volition void the warranty of your device merely may salve money.
Watch the following video to notice how to repair the cracked screen on your Nexus 5.
In fact, if yous simply need to fix the Nexus 5 cracked screen, you don't have to disassemble some pocket-size parts as this video, like the vibrating motor on the dorsum cover. Therefore, you tin can follow the step-by-stride tutorial beneath to replace the cracked screen on your Nexus 5.
Training earlier Starting the Replacement
Tools:
Small Phillips Screwdriver
Tweezers
Plastic Pry Tool
Instance Opening Tool
Part:
New Nexus 5 Screen Assembly with frame
Nexus five Croaky Screen Replacement Steps
Stride 1
Power the Nexus 5 off and take out the SIM card tray with eject pin.

Footstep two
Use the case opening tool to release the clips on the back encompass to separate information technology from the rear housing.

Footstep iii
Remove the back cover.

Footstep 4
Once the dorsum encompass is removed, utilize pocket-size Phillips screwdriver to undo 6 screws to remove the rear housing with the plastic pry tool.


Note: If the new Nexus five screen you get includes the minor components, like this Nexus 5 screen, then yous but have to transfer the motherboard and bombardment to the new screen. And then install the rear housing and back cover. Simply if the new Nexus 5 screen display doesn't include any modest components, you have to continue to follow the steps below.
Stride 5
Utilize small Phillips screwdriver to undo four screws to remove the loud speaker module.

Stride half-dozen
Release the battery connector and the main flex cablevision connector of connecting the display, loud speaker, microphone and notification LED advisedly with case opening tool.

Footstep vii
Lift the battery up with plastic pry tool.

Footstep eight
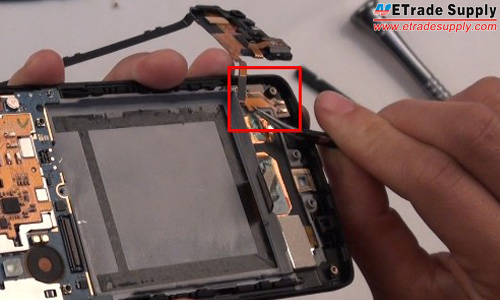
Gently disconnect the the main flex cable connector, and unplug the 4G antenna cablevision (the white 1) and 3G antenna cablevision (the black one) to remove them.

Step 9
Carefully lift upwardly the charging port flex cable with plastic pry tool. Please annotation the balance part is glued to the housing. Please peel information technology off carefully with tweezers.

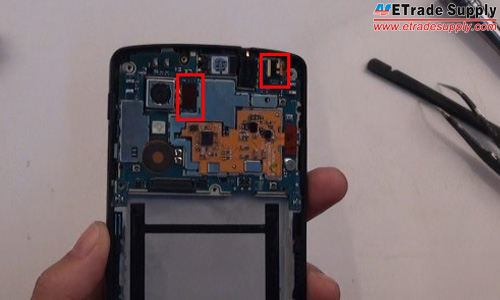
Step 10
Disconnect the rear facing camera and front facing camera connectors.
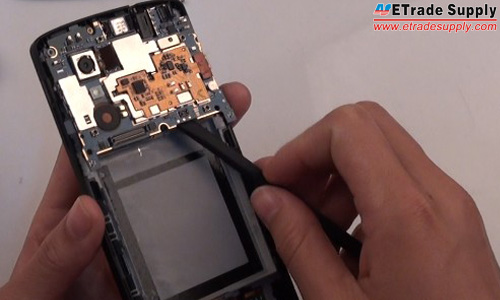
Stride 11
Gently employ plastic pry tool to elevator the motherboard upward and remove it.
Step 12
Remove the black tape, front camera, headphone jack, ear speaker, rubber gasket and rear photographic camera from correct to left advisedly.

Pace 13
Remove the power button and book button with the assistance of tweezers.

Now the broken Nexus 5 screen assembly with frame is gratis.

You can reassemble all the components back to the new Nexus 5 replacement screen equally the steps above in reverse social club or as the Nexus 5 reassembly video below.
UPDATE: Here's the latest information we've from our supplier: the D820 and D821 LCD+digitizer+frame replacements are interchangeable after multiple tests. Sorry for the inconvenience caused from the wrong data nosotros posted before.
Source: https://www.etradesupply.com/blog/how-to-repair-nexus-5-cracked-screen/
0 Response to "How To Replace Nexus 5x Screen"
Post a Comment